Wednesday, December 8, 2010
Tuesday, November 30, 2010
Embellished Note Pad Tutorial
I hope you all had a great Thanksgiving! I just posted a short video on making an embellished memo pad (spiral notepad). I hope you all like it!
Saturday, November 20, 2010
Woody Party Invitations
I just wanted to post the cards I have been working on for my nephew's birthday. I used Close to My Heart's Zippidee paper pack and Cricut's TOy Story cartridge! I think they worked together wonderfully! I used PostIt's new craft paper for the pieced Woody diecut, this makes the whole process so much easier!
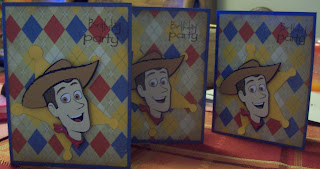


Here is a pic of one of the stamped envelopes!
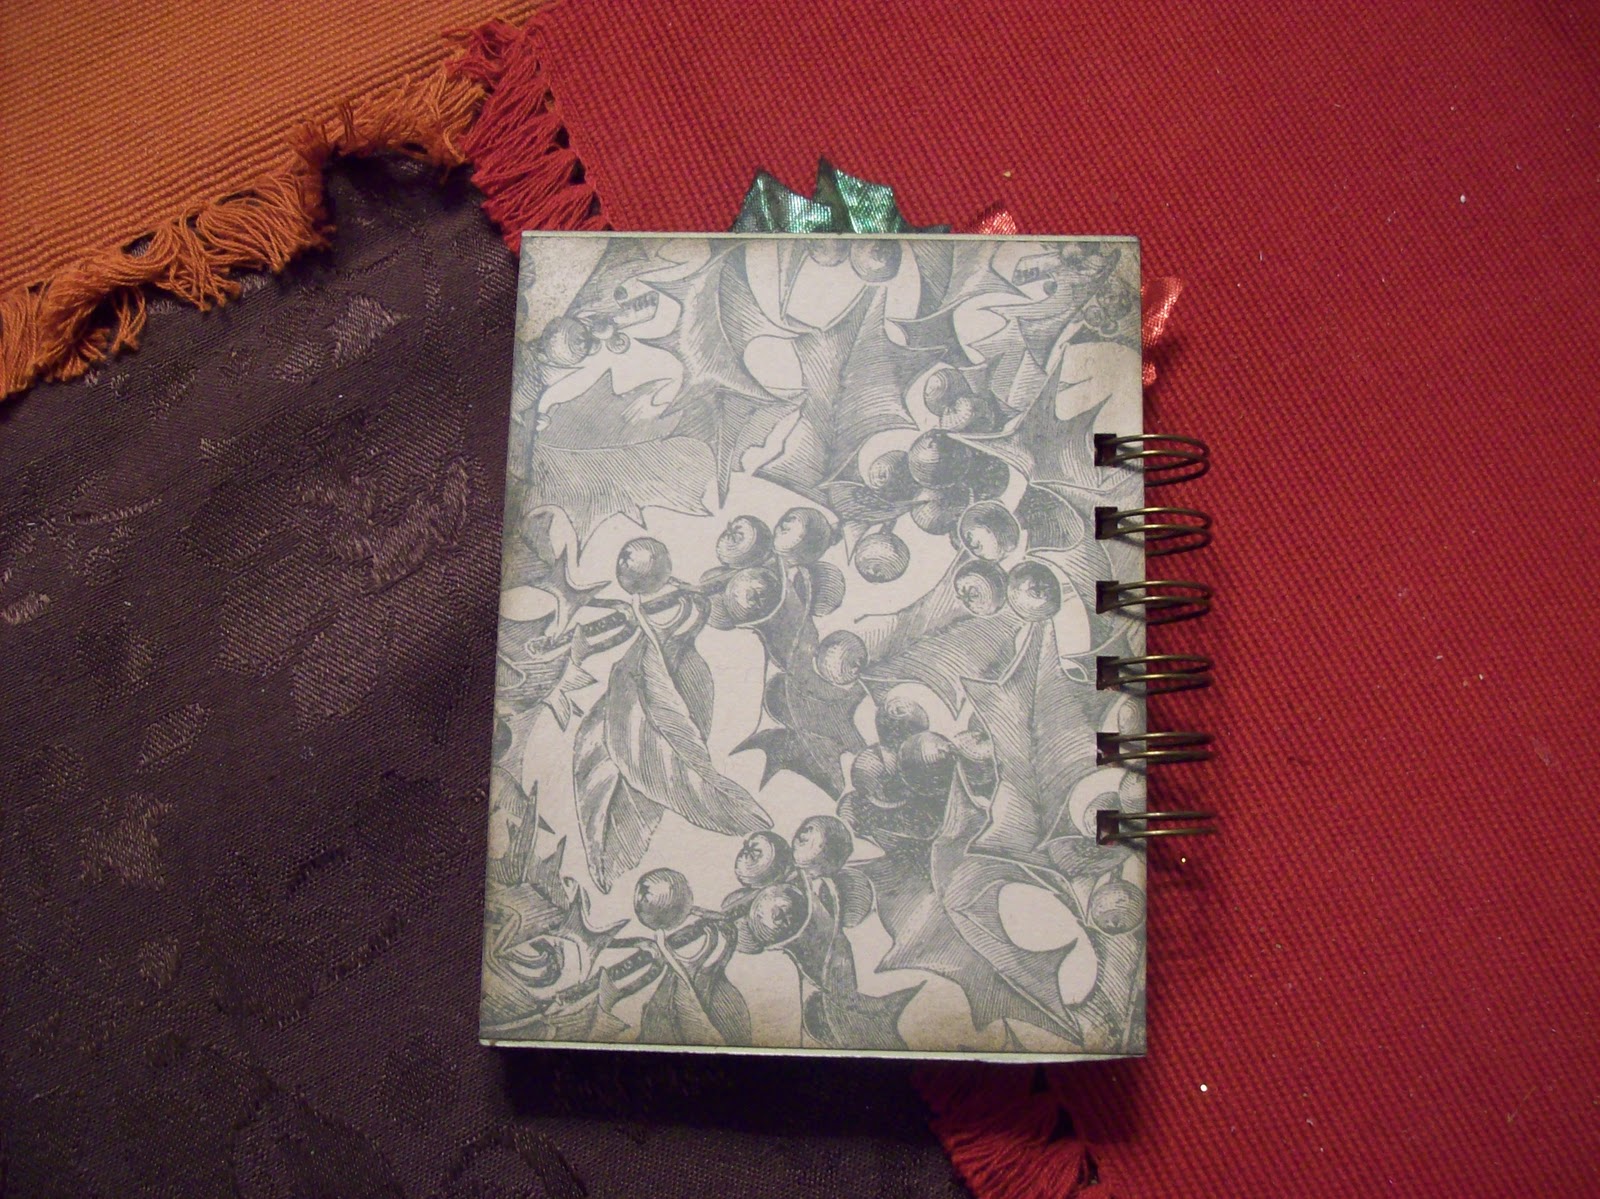
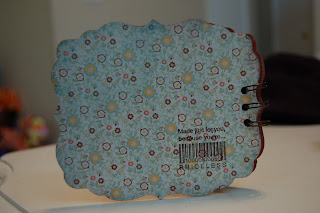
Christmas Mini Album - Anna Griffin Cardstock - Final Part
Here is the final video on making the Christmas mini album out of old envelopes and Anna Griffin cardstock! I hope you like th project. You can see the first video here: http://www.youtube.com/watch?v=PAntv0zPl_g. The second part here: http://www.youtube.com/watch?v=gDc5K0IJo9w. And the third part is here: http://www.youtube.com/watch?v=pV310ZsP4Fk
Here are some pics of the project:


Wednesday, November 17, 2010
Close to My Heart Mistletoe Workshop on the Go Card Tutorial
Here is one more tutorial using the CTMH Mistletoe Worksop on the Go! Here is a pic of one of the cards:

Winter Greeting Card using embossing resist
Hi, everyone! Please watch this video using CTMH stamps and glimmer mist! I was away for about one week, but I just posted two new videos! Thanks!
Here are a couple of pics of the card:


Tuesday, November 9, 2010
Holiday Card Demo - A Timber CTMH stamp set
I just wanted to post this cute card I came up with after being inspired by a British card magazine and watching Tresa Black make the 3D tree on her ustream channel (FabulouslyArtsy). I created this matchbook style card for my sister and her friends who are allowing me to teach them about Close to My Heart products and projects at a gathering this weekend. I was not able to use CTMH paper, because my sis bought all I had on hand (just reordered!), so this is just a mock up of what the project will be:

The sentiment "Happy Holidays" is stamped on the inside flap, and I will dress the tree up with glitter or stickles for the final project. I was really happy with the result! My sis wanted a card that could hold a pic of her children, so the inside is very plain so that she can insert the pic. I will post the final cards and dimensions after this weekend's gathering! TFL!

The sentiment "Happy Holidays" is stamped on the inside flap, and I will dress the tree up with glitter or stickles for the final project. I was really happy with the result! My sis wanted a card that could hold a pic of her children, so the inside is very plain so that she can insert the pic. I will post the final cards and dimensions after this weekend's gathering! TFL!
Monday, November 8, 2010
Cricut Wild Card and Folder Gift - tutorial part 1
Hi, all! I just wanted to share a three part tutorial I did using the Cricut Wild Card cartridge, Close to My Heart stamps, and a handmade folder to put them in for gift-giving! TFL!
Saturday, November 6, 2010
Four types of handmade flowers - tutorial
Hi, all! I hope you're having a wonderful Saturday! I had some time so I made a tutorial on making several small flowers to use on pages and projects! Please check it out!
Thursday, November 4, 2010
Peachy Keen Sketch Challenge and Tutorial
Hi, everyone! I wanted to share what I did with the latest Peachy Keen Sketch challenge. I used the sketch to make a scrapbook page, and it worked out beautifully! My niece dressed as the red queen from Alice in Wonderland, and I just so happened to have a paper punch from EK Success that has card suits on it, a Cuttlebug embossing folder with the Queen of Hearts on it, and a paisley one! Love it!! I used Gypsy wanderings and Graphically Speaking for the title.
The card was made using a thin black metal sheet that I distressed after I embossed it. I love this technique!


I also made a short tutorial on how I used a thin colored metal sheet and Cuttlebug embossing folder to make the Queen of Hearts card on my scrapbook page, TFL!
The card was made using a thin black metal sheet that I distressed after I embossed it. I love this technique!


Wednesday, November 3, 2010
Sizzix Album Page and Cover mini album
Hi, all! Check out my new video on using the Sizzix Album Page and Cover die to make a mini album! I love cranking out those pages!!
Peachy Keen Stamps - LFIF - Penguin Snowglobe Christmas Ornament
I broke out my Gypsy and made an ornament using the round ornament card shape from Joys of the Season, and used the penguin from the same cartridge. I cut the ornament card from American Craft red and silver foil cardstock and acetate, stamped the penguin's face with stamps from Peachy Keen, and poured in some MS glitter before I sealed it all up! I love the way it turned out, and plan on making lots more with my kids, nieces, and nephews.


Monday, November 1, 2010
Halloween Pretzel Gift
Hi, everyone! I hope you all had a fun and safe Halloween! I just wanted to share the easiest pretzel gift canister and recipe I have ever made! I love to make chocolate dipped pretzels for all sorts of occasions (just change the sprinkles for whatever holiday/theme you're going for).
I made these for my youngest son's childcare providers:

I used a canister that I got at the jelly belly factory for 25 cents, cuttlebugged some spiders and bats, and added a halloween ribbon around the top. The coordinating pretzels were made with sourdough pretzels, 4 oz. of melted chocolate bark, drizzled with white chocolate bark, and sprinkled with halloween themed sprinkles! They came out so nice! TFL!!
Thursday, October 28, 2010
File Folder Mini Album - Tutorial
Check out this new video I made today on how to make a cool file folder mini album! I'll post pics of the file folder albums that I've been making soon! TFL!
Wednesday, October 27, 2010
Peachy Keen Let's Face it Friday - Fall Project
This was sooo much fun! I've been looking for new ways to use my melting pot and UTEE embossing powder. I thought of creating something with lots of leaves, and thought a pumpkin would be a good object to put a Peachy Keen face on! I came up with this votive candle holder.
I stamped the face with StazOn ink in Timber Brown because I didn't want to risk it melting away when I dipped it in the UTEE. I cut everything from the Speaking of Fall cartridge, cut shadows, and attached the leaves to the shadow layers just on one edge so that the other edge of the leaves had some dimension. I then dipped those in UTEE, and it worked like a charm! I attached the pieces to the glass votive with a hot glue gun for durability. I think I might make a video on this because it was so simple, but packs as lot of punch! TFL!


I stamped the face with StazOn ink in Timber Brown because I didn't want to risk it melting away when I dipped it in the UTEE. I cut everything from the Speaking of Fall cartridge, cut shadows, and attached the leaves to the shadow layers just on one edge so that the other edge of the leaves had some dimension. I then dipped those in UTEE, and it worked like a charm! I attached the pieces to the glass votive with a hot glue gun for durability. I think I might make a video on this because it was so simple, but packs as lot of punch! TFL!


Imagine Nation Monday - Polka Dots
Here is my project for Emma's challenge. I used a premade blank Studio G card, and added a little "It's a Boy" scalloped circle from the Nursery cartridge to the inside of the card so it showed through the card's circle cutout. Then I printed out a onesie from the same cartridge with a blue polka dot pattern, and added the bib with dimensionals! TFL!


Monday, October 25, 2010
Stationary Set Folder Tutorial
Check out my new video on making a super cute and quick stationary set for gift-giving!
http://www.youtube.com/user/vianneylu1?feature=mhum#p/a/u/0/wueR_gL7sk4
http://www.youtube.com/user/vianneylu1?feature=mhum#p/a/u/0/wueR_gL7sk4
Friday, October 22, 2010
Gift Wrap Idea for Peachy Keen Challenge - Wine Bottle Belly Band
I thought really hard to make something you don't see everyday as far as gift wrapping. So, I used Peachy Keen's Gingerbread Doll Set to make a wine bottle belly band! I like to give wine during the holidays because it is always well received! I used an EK Success punch around a 5x10 piece of red cardstock, and asttached that to a green piece of cardstock cut at the same size. I used a Michael's stamp for the greeting. This was a difficult project to photograph, but I think you can still see the general idea of it! TFL!


Inchies Swap - October
I love participating in swaps and challenges over on Club CK's site. This month I'm in an inchies swap for Christmas and winter themed inchies. I used MS snowflake punch and glitter, fiskars scalloped square punch, Marvy circle punch, and CTMH stamps (A Timber). Here are my creations:


Tuesday, October 19, 2010
Throwback Thursday Challenge - Everyday Paperdolls Animal Card
I took the fishbowl from EDPD, and welded it on my Gypsy to make the card. Then cut two sizes of fish to make a little family! I then Stickled the heck out of it!! TFL! Submit your own card for this challenge on Emma's blog: http://www.creativetimeforme.com/


Saturday, October 16, 2010
Thursday, October 14, 2010
My Son's 10th Birthday Party Invitations
Hi, everyone! Here are some pics of my son's invites, I think they came out pretty cool! He wanted a military theme (takes after daddy, I guess!), so I used cards from the Stand and Salute cartridge, and phrases from Graphically speaking. Here they are:


The "you're invited" part is on the back! Also, I thought it was funny that all of those Confidential phrases came off of the mat in almost the exact same way! That naughty "O" just didn't want to stay put.
Wednesday, October 13, 2010
Peachy Keen Let's Face it Friday - Inspiration
I made a card for my wonderful hubby, who never ceases to amaze me! He is deployed overseas right now, and I hope he knows how much we miss him and how much he means to us! I made a little barefoot military man using an everyday paperdolls outfit, and completed his face with a few stamps from Peachy Keen's Basic Paper Doll Faces. I added a sentiment from the Graphically Speaking cartridge, white stitch lines, and a white card liner to complete my gatefold card for him!


I think it's kinda cute that you can barely see his eyes under the hat brim, just like my husband wears it!

Fall Project for My Pink Stamper's Countdown to Karlee!
Here is a super quick, and easy, file folder mini album I made for today's challenge! TFL! If I get enough intrest, I'll post how to make it, it only takes one file folder, patterned paper, cardstock, and embellies! I used beautiful Fall colors, and will add a few of this year's Thanksgiving photos on the tags!


Tuesday, October 12, 2010
Pink Stamper's Pick of the Patch Challenge
I think this qualifies as "something cute!" I created a box from a generic Sweet Treats cartridge box, added a rickety fence on both sides, then added pumpkins from Paperdoll Dress Up. I stamped the pumpkin face with a Peachy Keen stamp. Then added some ribbon that I found at WalMart, TFL!


I might add some stickles, but I plan on making 35 of these for my son's class, so I may forego them!


I might add some stickles, but I plan on making 35 of these for my son's class, so I may forego them!
Monday, October 11, 2010
Imagine Nation Monday Challenge - Shaped Book
I made this shaped book on my Imagine using the shapes preloaded on the machine, and coloring them with some patterned paper on the Imagine More cartridge. Since a few times the machine messed up cutting the shape out (the cut was off, this has been my problem with this particular machine - it's getting replaced), I cut the messed up ones in half and made pockets using the portion that was cut correctly! Scrappers hate to waste, don't we? I also print and cut some icons from the same cartridge. I used CTMH and ColorBok stamps for the sentiments. TFL!!


Go check out http://www.creativetimeforme.com/ for info on this fun challenge!
Holiday Project
Hi, everyone! I just finished making a giftcard holder for MyPinkStamper.com's challenge. I used a rectangle from B is for Boy and a snowflake from Joys of the Season to weld a card, and then folded a pocket for the giftcard. I will stamp a sentiment on the inside once I know who I'm giving it to; something like "Happy Holidays" is probably best. Here it is:


Sunday, October 10, 2010
Envie Album Tutorial
I was planning on doing a tutorial for these albums that I love making, and Tresa (fabulouslyartsy.com) had the perfect opportunity for me to get this "tute" out! So here it is:
You will need four envelopes (I used Mead dollar store ones - they measure 4 1/8" x 9 1/2"), two to three sheets of patterned cardstock, and all the embellies you want! You can put the album pages in any order, just keep your order in mind as you paper your pages.
1) Cut two of the envies in half. These will become your front/page 1 and back/page 8, and two pocket pages:

2) Cut two inches off of one side of one envie (I did two inches, but you can cut off however much you want). This will create a flap page with a pocket, and a pocket for your last page. Score the longer envie piece at 4 3/4" from closed end to create flap (the score varies depending on the dimensions of your envelope, but you want to score it at whatever length half of your envelope is):

3) Score and fold one envie in half, then adhere the bottom edge and open side closed with strong adhesive. This will create a pocket page with a top pocket:

4) Cut patterned papers to fit your pages. Starting with the covers (two of the envie halves) and the pocket page made in step three: I cut my papers at 4 1/8" x 9 1/2". Score and fold the paper at 4 3/4", cover with adhesive (I used my ATG) and wrap paper around one of the envie halves covering the opening with the fold of your paper. Repeat with the other envie half and pocket:

5) Next, cover the last two half envie pieces with paper cut at 4 1/8" x 4 3/4" (or whatever half of your envie is). I cut my pieces a little longer, scored at 4 3/4", and tucked the little flap into the envie opening for a more finished look:

Sorry, I didn't have an "in the process" pic of this part!
6) For the longer envie section that has the score and flap, cover it with two pieces of paper measured at 4 1/8" x 7 3/4" (or whatever measurements you have for this envie).

7) Take that small section that was cut off of the previous envie, and cover it with a small piece of patterned paper that coordinates with your last page. Adhere this piece vertically to the right edge of your last page. This will create a small pocket:


8) Arrange your pages in order, and bind with whatever method you are most comfortable with. I use my Bind It All for most projects, I used eyelets and rings for this one because those things are more cost effective and more widely available! You can even use ribbon.
9) Create tags for the pockets! I wait until the book is bound to make the tags so that I don't end up piercing my tags with the BIA or eyelets, and so that they still fit after being bound. Here are a couple of pics of the album I featured in the steps, there are many more on my blog under Cosmo Cricket Mini Album. Come check it out!!


Thanks for looking, I hope these instructions were clear. Maybe I should manke a video? This was my first try at a tute!!
Subscribe to:
Posts (Atom)